Cultivating Orchids: A Comprehensive Guide
Posted on 14/06/2025
Cultivating Orchids: A Comprehensive Guide
Orchids, with their mesmerizing variety and delicate beauty, have enchanted plant lovers worldwide for centuries. From beginner horticulturists to experienced collectors, cultivating orchids is a rewarding journey that brings elegance and natural charm to every space. This comprehensive guide to growing orchids is designed to empower you with the essential knowledge needed for successful cultivation, care, and enjoyment. Let's delve into the fascinating world of these exotic plants!
Understanding Orchids: Botanical Basics
Orchids comprise one of the largest and most diverse plant families on our planet, with over 25,000 species and 100,000 hybrids. Their unique structures, intriguing pollination mechanisms, and striking blooms captivate growers all over the globe. The majority of commonly grown orchids fall into a few key categories, each with particular needs:
- Phalaenopsis (Moth Orchids): Popular for their long-lasting blooms and easy care requirements.
- Dendrobium: Known for vibrant colors and upright sprays of flowers.
- Cattleya: Revered for their fragrant, large blossoms.
- Oncidium: Often called "dancing lady orchids" for their lively flower shapes.
- Vanda: Prized for vivid, eye-catching colors and prolific blooms.
Without doubt, cultivating orchids demands an appreciation for diversity. Knowing the type of orchids you wish to grow is the first step in ensuring a successful cultivation experience.
Choosing the Right Orchid for Your Environment
Before diving into the intricacies of orchid cultivation, it's vital to select species or hybrids that will thrive where you live. While some orchids adapt well to household environments, others require greenhouse-like conditions. Consider the following:
- Temperature: Warm-growing orchids like Phalaenopsis and Vanda excel in typical indoor settings, while others, such as Cymbidium, prefer cooler conditions.
- Humidity: Most orchids favor a humidity range between 40-70%--much higher than found in average households. Humidifiers, trays with pebbles, or grouping plants together can help achieve optimal moisture levels.
- Light: Assess the natural light in your space. East or south-facing windows generally work well for most orchids, but some (like Paphiopedilum) prefer shadier spots.
Tip: Research your chosen orchid species' specific needs for the best results.
Essential Supplies for Growing Orchids
Growing Containers
Orchids grow best when their roots have adequate airflow. Choose pots made from clear plastic, clay, or even slatted baskets for optimal drainage and observation. Orchid pots often include extra holes to improve air circulation.
Potting Media
Conventional soil is unsuitable for most orchids. Instead, use specialized orchid potting mixes containing bark, sphagnum moss, perlite, or charcoal. The right medium keeps roots both moist and aerated.
Other Supplies
- Fertilizer formulated for orchids
- Watering can or gentle sprayer
- Humidity tray or indoor humidifier
- Pruning shears or sharp scissors
- Labels or tags for keeping track of species and hybrids
Providing the Ideal Growing Conditions
1. Light Requirements
The majority of orchids require bright, indirect sunlight. Too much direct sun can scorch their leaves, while insufficient light hampers blooming. Use sheer curtains or position your orchids near east- or south-facing windows. Some indoor gardeners use LED grow lights to supplement natural lighting, particularly during short winter days.
- Yellowish-green leaves indicate proper lighting.
- Dark green leaves suggest more light is needed.
- Reddish or scorched leaves point to excessive sun.
2. Temperature
Temperature preferences vary among orchid species. Many thrive with daytime temps of 65-80?F (18-27?C) and nighttime temps of 55-65?F (13-18?C). Small temperature drops at night encourage flower spikes and robust blooming.
3. Humidity & Air Circulation
Orchids are native to humid rainforest environments, so maintaining moisture in the air is crucial. Place your orchids on humidity trays or use a small room humidifier to keep levels above 40%. Ensure gentle air movement with fans or open windows, as stagnant air promotes disease and pests.
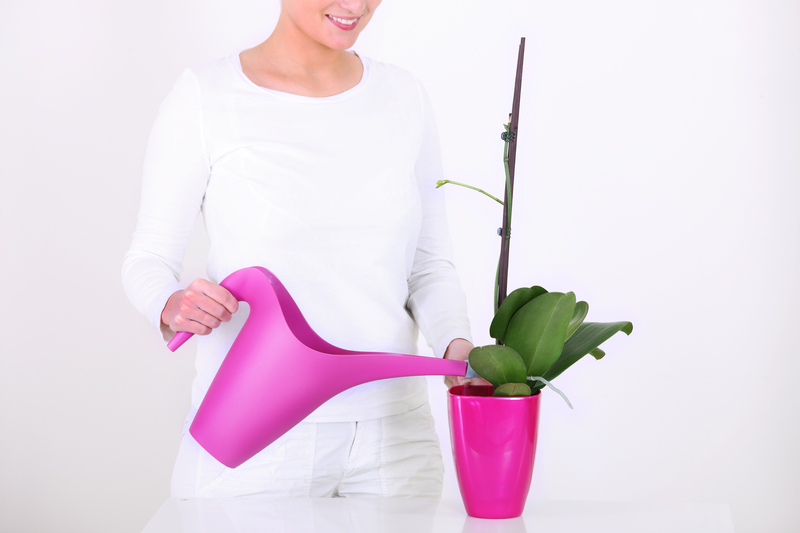
4. Watering Orchids Properly
Proper watering is one of the most critical factors in successful orchid cultivation. Overwatering quickly leads to root rot, while underwatering can desiccate the plant.
- Water thoroughly but infrequently: Wait until the potting mix is almost dry before watering again.
- Water in the morning: This gives plants time to dry off by evening, reducing disease risk.
- Use room-temperature water: Cold water can shock orchid roots.
A general rule of thumb: Phalaenopsis and Paphiopedilum like damp media; Cattleyas and Dendrobiums prefer their roots to dry between waterings.
5. Fertilization Needs
All orchids need nutrients, but weakly applied, balanced fertilizer is preferable to strong, infrequent doses. Use a fertilizer designed for orchids, diluted to about one-quarter strength, every two weeks during the active growing season.
- "Weekly, weakly": This popular motto reminds growers to fertilize lightly on a regular basis.
- Flush the potting mix with plain water monthly to prevent salt buildup.
Repotting Orchids
Repotting is necessary every 1-2 years to refresh the potting media and examine the plant's health. Knowing when and how to perform this task is integral to successful orchid cultivation.
- Signs an orchid needs repotting: Decomposed potting mix, roots growing over the pot rim, or crowded roots.
- Best time to repot: Immediately after the plant has finished blooming and new growth is emerging.
Repotting Steps
- Gently remove the orchid from its current pot, shaking off old potting mix.
- Trim away dead or mushy roots with sterilized scissors.
- Place the orchid in a clean pot, filling in with fresh orchid mix around the roots.
- Water sparingly for the first week to reduce transplant shock.
Common Orchid Pests and Problems
Even with attentive care, orchid growers may encounter a few pests and diseases. The most common issues include:
- Mealybugs: Look for cottony clumps on leaves and roots. Remove with a cotton swab and alcohol solution.
- Spider mites: These tiny pests cause stippling and yellowing of leaves. Increase humidity and treat with insecticidal soap if necessary.
- Scale insects: Hard, brownish bumps that cluster on stems and leaves; wipe away or treat as above.
- Root rot: Caused by overwatering and poor drainage. Cut away affected roots and repot in fresh, well-draining media.
- Fungal/bacterial leaf spots: Prune affected leaves and improve airflow around your plants.
Prevention is the key: keep a clean growing space, isolate new plants, and monitor conditions regularly.
Orchid Propagation: Growing Your Collection
One of the delights of Orchid horticulture is expanding your collection via propagation. There are several methods of propagation depending on the type of orchid:
- Division: The most common method for sympodial orchids (Cattleya, Dendrobium). Simply split the rhizome, ensuring each new division has 3-4 pseudobulbs.
- Keikis: Some orchids (notably Dendrobium and Phalaenopsis) produce small 'baby' plants, or keikis, along their flower spikes. Once the keiki grows roots, it can be potted on its own.
- Seed propagation: This method is advanced, requiring sterile conditions and patience, but can yield unique hybrids and species.
Tip: Take care when dividing orchids--sterilize tools and handle roots gently to minimize stress.
Encouraging Blooming in Orchids
Nothing compares to the thrill of seeing your efforts result in spectacular orchid flowers. If an orchid refuses to bloom, consider these key factors:
- Light: Insufficient light is the most common reason orchids fail to flower.
- Temperature: Some species need cooler night temps to trigger bloom spikes.
- Nutrient balance: Overfertilizing with high-nitrogen feeds encourages foliage but delays blooms. Switch to a bloom formula when buds begin to form.
- Rest period: Some orchids (like Dendrobiums) require a period of reduced water and fertilizer to stimulate flowering.
Patience is essential: many orchids bloom just once each year. With attentive care, you'll be rewarded with an array of colorful, long-lasting blossoms.
Displaying and Enjoying Your Orchids
Whether arranged on a windowsill, showcased in decorative pots, or cascading from hanging baskets, orchids add instant sophistication and serenity to any setting. When displaying your plants:
- Group orchids together for higher humidity and a lush, jungle-like effect.
- Rotate plants regularly so all sides receive even light exposure for uniform growth.
- Use attractive containers that complement your decor, but ensure they have drainage holes.
Embracing regular maintenance--such as wiping leaves, removing spent blooms, and checking for pests--keeps your collection healthy and inviting.
Frequently Asked Questions About Orchid Care
- How often should I water my orchid? Water only when the potting mix is nearly dry; this may be weekly or less depending on humidity, pot size, and orchid type.
- Why are my orchid's leaves wrinkled? This often indicates underwatering or root problems. Inspect the roots and adjust your routine as needed.
- My orchid has finished blooming. What's next? Trim the flower spike above a node on Phalaenopsis to encourage a new spike, or cut back to the base for a fresh start.
- Are orchids toxic to pets? Most orchid species are non-toxic to cats and dogs, but double check the specific type you have.
Conclusion
Cultivating orchids delivers joy, beauty, and a sense of accomplishment to gardeners at every experience level. By understanding their unique requirements--light, humidity, temperature, watering, and nutrition--owners can nurture thriving, blooming specimens year after year. With patience, attentive care, and a willingness to learn, anyone can master the delightful art of orchid cultivation and enjoy the stunning diversity of one of nature's most extraordinary plant families.
Start your orchid-growing journey today and watch your indoor spaces transform into blooming tropical havens!
Latest Posts
Transform Your Windy Garden into a Serene Oasis
Garden Resurrection: Breathing New Life into Neglect
Designing an Engaging Outdoor Haven for Kids